Automater Output Format and Modifications
 Wednesday, December 11, 2013 at 12:44AM
 Our recent post on the extensibility of Automater called for a few more posts discussing other options that the program has available. Particularly, we want to show off some different output options that Automater provides and discuss the sites.xml modifications that provide different output formatting. Please read the extensibility article to get caught up with sites.xml modifications if you are not aware of the options provided with that configuration file.
Automater offers a few possibilities for printouts outside of the standard output (screen-based output) that most users are aware of. By running:
python Automater.py 1.1.1.1 –o output.txt
We tell Automater to run against target 1.1.1.1 and to create a text file named output.txt within the current directory. You can see here, that after Automater does its work and lays out the standard report information to the screen, it also tells you that it has created the text file that you have requested.

Once opened, it is quite obvious that this is the standard output format that you see on your screen now saved to a text file format for storage and further use later.
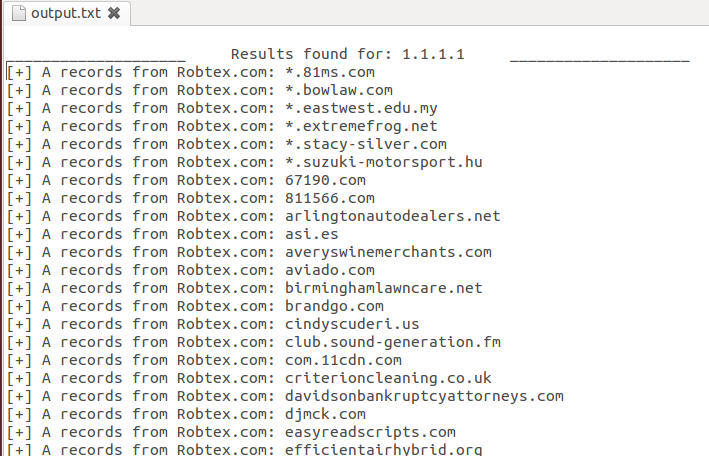
While this text format is useful, we thought it would be better to provide the capability to provide a csv format as well as something that would render in a browser. To retrieve a csv formatted report, you would use the –c command line switch and to retrieve an html formatted report, you would use the –w command line switch. These options can all be run together, so if we ran the command:
python Automater.py 1.1.1.1 –o output.txt –c output.csv –w output.html
We would receive 3 different reports other than the standard screen reporting – 1 standard text file, 1 comma-seperated text file, and 1 html formatted file. Each of the reports are different and can be utilized based on your requirements.
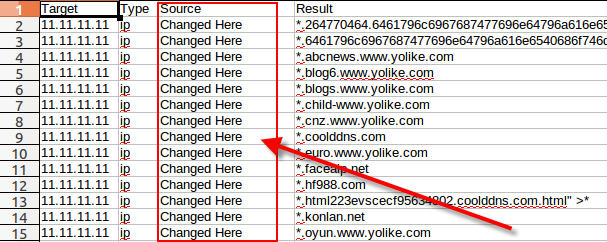
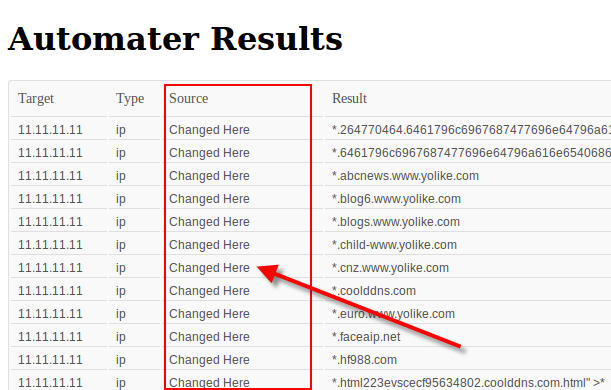
Since we’ve already seen the text file, I wanted to show you the layout of the HTML and comma-separated outputs. Below you can see them, and I think you’ll find each of these quite useful for your research endevours.
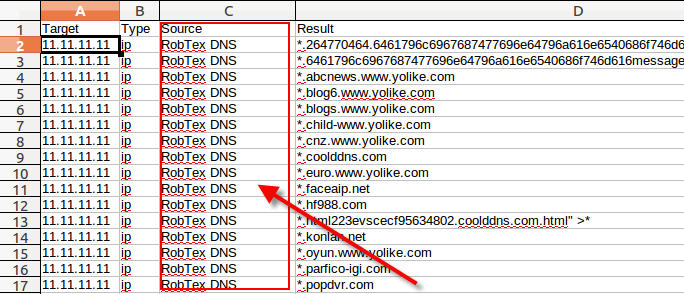
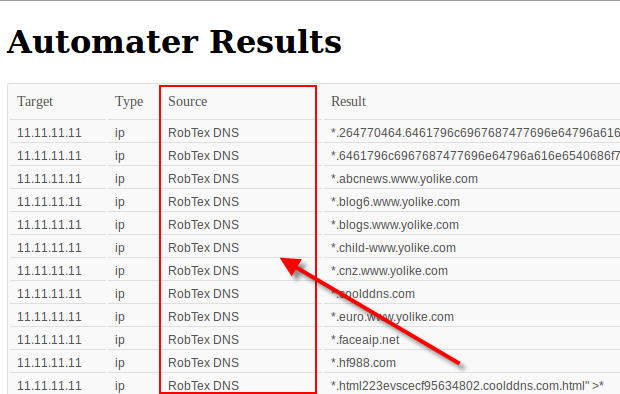
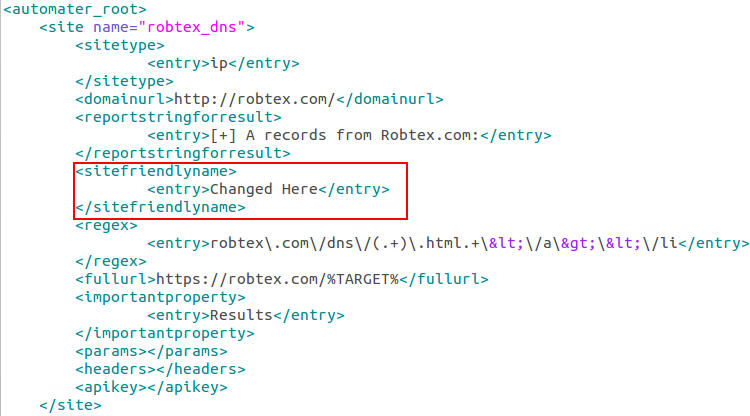
You will notice that I’ve called out a specific “column” in each of the files that is marked with the header “Source” in each. This is where the modification of the sites.xml file comes into play. Again, if you need to take a look at how to use sites.xml file for adding other sites and modifying output functionality, please see this article. But for now, let’s take a look at what we can do with changing the html and comma-separated report format functionality by changing one simple entry in the sites.xml file. Below, you can see a good look at the robtex.com site element information within the config file. It is obviously here that we want to modify this scenario, since both of our outputs have RobTex DNS written out in the Source “column.” Looking at the sites.xml file we can easily see that this entry must be defined within the <sitefriendlyname> XML element.
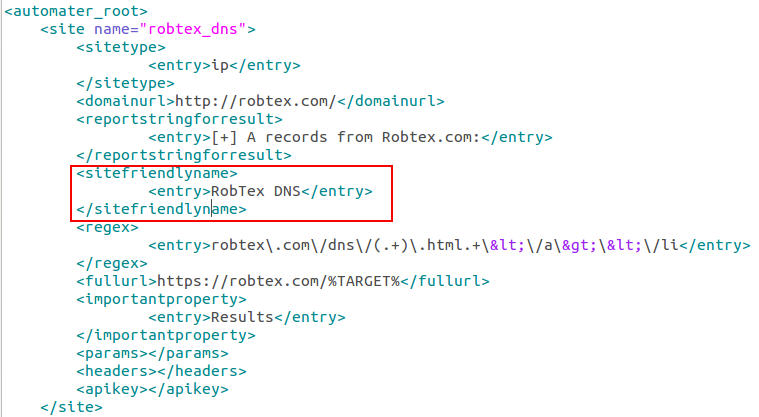
Let’s change our sites.xml file to show how modifying the <sitefriendlyname> XML element can change our report ouput. We will change the <entry> element within the <sitefriendlyname> element to say “Changed Here” as seen below:
Now we will run Automater again with the same command line as before:
python Automater.py 1.1.1.1 –o output.txt –c output.csv –w output.html
And we’ll take a look again at our output.csv and output.html files. Notice that the Source “column” information has been changed to represent what you want to see based on the sites.xml configuration file.
As you’ll see when you inspect the sites.xml format, you can change these <entry> elements within the <sitefriendlyname> elements for each regular expression that you are looking for on those sites that have multiple entries. This allows you to change the Source output string in the file based on specific findings. For instance, if you look at the default sites.xml file that we provide you at GitHub you will find that our VirusTotal sites have multiple entries for the Source string to be reported. This allows you full autonomy in reporting information PER FINDING (regex) so that your results are easily read and understood by you and your team.
Reader Comments